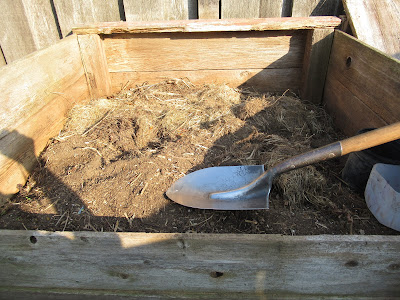
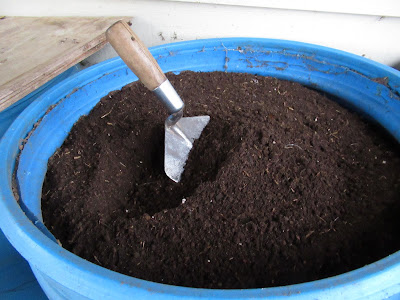
My main composting method is a Slow Compost, a 3 or 4 year old box of weeds, shaken out pieces of sod, spent plants, garden waste and kitchen waste from the growing season.
The other kind of compost, Fast Compost, can be cooked up in almost 3 weeks when one has all the right ingredients at the exact time. The carbon / nitrogen ratio needs to be just right – the proper blend of carbon containing organic matter, like leaves, straw, spoiled hay, coarse plant stalks (never? sawdust) with nitrogen containing ingredients such as manures, grass clippings and other green garden waste. For Fast Compost the right balance is blended into a 4 foot wide / high pile and turned every 2 or 3 days to add oxygen. Proper moisture levels must be maintained.
The temperatures in Fast Compost build up to 160° F which kills pathogens and weed seeds. It is totally wonderful stuff! But it’s Magic. You must get all the incantations right or you either have a cold pile or a stinking mess.
I prefer to make my stress free, Slow Compost over a 3 or 4 year period. I build a wooden box 4 feet square and toss in all the waste organic matter I run into from my backyard. (never sawdust, and my tree’s leaves are used for other things) I let the rain get into it occasionally and even step in it to tramp the stuff down occasionally to make room for more.
The only potential stress comes from the fact that Slow Compost doesn’t kill weed seeds. Therefore, I must be careful as to which weeds I throw into the box – nothing that has almost mature seeds on them.
This year my old compost box was full, so I built another one. (That new one turned out to be 3 feet by 5 feet.)
The front boards of the old box slide out and I start by removing the top few inches and tossing them into my new box. Then the balance, what looks like humusy soil, is sifted over my wheelbarrow.
I keep three containers handy, one for stones, one for bits of garbage (trash) and one for woody things like sticks, pine cones or large stems that didn’t break down. Any non woody parts that didn’t quite break down, but should still break down, like mossy sod pieces, are tossed into the new box.
The rest is sifted in my fine one quarter inch screen that sits on my wheelbarrow.
Anything else that doesn’t quite go through the screen but doesn’t fit the other descriptions gets tossed around one of my grapes for mulch.
My quarter inch screen was a bit slow for such a large amount, so I built a new screen from some galvanized, diamond shaped metal lath – the kind possibly used for some kinds of stucco or masonry work.
I’ve learned from TOG that the longer lasting, trouble free screens have more than just staples to hold the bottom screen on. I now use some wood strips to cover over the exposed edges of the stapled on lath.
The wonderful, dark, fine stuff in the wheelbarrow is carried to my collection of barrels under my deck. This is the main ingredient for my next few years of potting mix.
Since my soil is a Sandy Loam and has very little clay in it, even a bit of soil tossed into my compost box with the weeds and sod pieces isn’t a detriment to my potting mix. More clay in a soil would be different. The capillary action of water in clays turns a potting mix into something closer to concrete.
The walnut tree I planted in the front yard 36 years ago has extended its roots all through my front yard. These roots exude a growth inhibitor so we can’t successfully grow many flowers in the front yard. Therefore, all of our front flowers must be grown in pots and containers. And my Lovely Wife is quite good at keeping colour in the front yard. Our large amounts of potting mix are one key to such flowers.
Of course, the potting mix is also great for my home seeded vegetable bedding plants. How to fortify the mix will be described in Part 2.
Happy Gardening.


No comments:
Post a Comment