Wednesday, December 30, 2020

A Favourite Tool: Black Plastic Bed Covers

More than three decades ago, a coworker, one who also was a vegetable gardener, told of growing his corn through a black plastic sheet.  Using the plastic as a mulch and weed barrier, he had great success keeping the corn warm and weed free with his black plastic 'mulch'.  

I gave it a try.  I bought a roll of 6 mil black plastic, 10 feet wide by 100 feet long and cut it into pieces 5 feet by 12.5 feet.  These comfortably covered a 4 foot by 12.5 foot, 50 square foot bed with room to spare.  That roll gave me 16 bed cover pieces. The plastic turned out to be Silage Cover plastic that was used by the area farmers to cover the open silage ends of their dairy farm's bunker silos.  The stuff was very ultraviolet resistant and has never broken down in the sunlight for these 30 odd years.

Last year's carrot beds just before planting.
Not only did the corn grow weed free – I’ll demonstrate how when I next plant my corn, -- but it was very handy in keeping weeds down in other beds growing the squash and the cabbage families – anywhere the plants spacings were wide enough for regular slits in the reusable plastic.

Last year's corn bed started in black plastic.
My Pacific North West location receives 63 inches of precipitation (mostly rain) per year.  That constant wet from mid-September into mid-May and sometimes June leaches out nutrients from the soil.  Our cloudy, cool, damp springs can let local weeds flourish while our vegetables slow and languish.  Hoeing weeds in the spring when the soil is wet doesn’t work, it just transplants them and that added stress inclines them to go into seed production. (that’s not good).

Black Plastic Bed Covers can keep the rains from leaching nutrients, restrict the sun from growing weeds, and warm the soil earlier than usual. The bed cover can also be used to stunt or kill any winter cover crops like fall rye in a matter of weeks.  

Notice on left bed -- dead fall rye after removing black plastic
The sheets are also good for covering newly manured beds, like the chickens’ run, once the birds have been moved to their next location.  The black plastic helps warm the soil and gives the microbes a head start in processing and readying the new nutrients.

Two beds from old chicken run.
With my yard sitting on top of 200 feet (deep) of gravel, just below my shallow subsoil is a wealth of sand, stones, and rocks (wealth that is if you had a gravel pit).  These Coarse Soil Particles are always trying to get my attention whenever I dig, rake, or turn the soil.  Technically they’re great for drainage and for helping warm up the soil in the spring but my perpetual OCD project is to constantly remove them.  I gather pails of them each year and stack the larger stones in a corner.  These larger rocks I use as temporary anchors for my Black Plastic Bed Covers.

Before covering I like to rake a slight hill along the center of the bed for better runoff into the paths.
When the time to plant arrives I simply pull off my black plastic bed cover and often just fortify, till, rake and plant.  

When Jean-Martin Fortier’s book, “The Market Gardener – A Successful Grower’s Handbook for Small-scale Organic Farming” came out in English in 2014, I was pleased to see that he too recommended the use of black plastic as a weed suppressor.  

I was a bit too proud to hear that I’d been ‘doing it right’ for many years on my much smaller scale garden.  My son TOG hadn’t yet gotten into using that tool on his acre-plus but quickly adopted it as he gradually had the funds to afford larger scale sheets.  He found it to be an initial cost that was well worth it.

My Black Plastic Bed Covers are a tool that I’d have a hard time doing without.  That’s why I invested in a second roll – just in case.

Happy Gardening.


Monday, December 28, 2020

Learning From My Failures: Carrots

One of my big gardening enemies these many years has been the Carrot Fly.  Its maggots leave nasty, rusty holes in my winter storage carrots.  Over the last four growing seasons I’ve beaten them twice.

Bolero carrots from a Good year.


For that first successful year, I had initiated my Carrot Frames – a 2.5 foot high boundary fence of clear plastic stapled onto 2 X 2’s surrounding the carrot bed.  And it worked!  After so many years of failure I had the cleanest carrots all winter, stored the whole winter and early spring in the same bed under a one foot layer of maple leaves.

Four foot row of Bolero carrots across bed, overwintered under foot deep of leaves, picked / lifted in late December.

The next year was my 35th year gardening in this location so I practiced my fifth Sabbath Rest Year.  That year I planted only Red Clover in the vegetable garden.  In the past, the seventh-year rest worked well as the kids grew up.  They really learned to appreciate all the great tasting, home grown produce we didn’t get to eat that year.  And it gave me a break from the labour of constantly gardening.

It’s not that I’m Jewish nor are we chained to Mosaic Law. 

Leviticus 25:4 But in the seventh year the land is to have a year of sabbath rest, a sabbath to the Lord. Do not sow your fields or prune your vineyards.  

But it was a good exercise, especially for a doomer like me, to practice faith that the Lord would supply all our needs.  

Matthew 6:31-33   So do not worry, saying, ‘What shall we eat?’ or ‘What shall we drink?’ or ‘What shall we wear?’ 32 For the pagans run after all these things, and your heavenly Father knows that you need them. 33 But seek first his kingdom and his righteousness, and all these things will be given to you as well.

The next year following the Rest, I continued my rotation down the garden and once again my carrots were wonderfully clean of carrot fly damage.

But the third growing year, the bug damage came back. Could it have been the screen door I’d made in my greenhouse that opened into the carrot beds?   Was the fence too low?  Were they getting under the fence somehow?  What else could I change?  

Therefore, in preparing this last growing season’s carrot beds I increased the height of my ‘fence’ to 3 feet, made sure all the carrot frame’s ground perimeter was well secured, removed any outside stairs for stepping over the fence, made sure all old possibly contaminated covering leaves didn’t enter the new beds, plus I had moved the greenhouse with its screen door to the far end of the garden.

But in spite of all that, this last, fourth growing season was also a bust.  

Five pounds of Bolero carrots from four foot row across bed.

Carrot fly damage.

What did I do wrong?  The season’s carrots are still tasty and usable, it’s just that they’re ugly and a bit of a pain to prep and not something I could give away as gifts.

I have thought of two options. 

1) Perhaps the carrot flies are flying over the top of the fence? (they're not supposed to be able to get higher than 18 inches.)  That would mean I need some of that new netting one can get for such a purpose.  My son TOG uses such netting for his carrot beds.  He doesn't use a fence.  

2) Or perhaps the flies are laying eggs right next to the previous beds and lie in wait for my next rotation?  If that is the case, my rotation needs to be farther apart rather than just the next beds over.  

I believe I’ll try the second option.  That potential solution works well for me this coming year.  My carrot beds have reached the end of the four-year rotation and now move all the way back to the far end of the garden.  If successful, it will show I don’t need a roof screen-net.  I just need to change my rotation.  If not successful, then I’ll need a screen net.

With my expanded garden this last year I have room to change my rotation if needed.  I’ll also tighten up the screen door on the greenhouse now that the carrots will again be next to it.

One of the reasons I’ve always grown vegetables is that I Wanted to learn how.  Because someday I (we) may Need to know how.  I think maybe those days are soon coming.  And learning from my failures --- is still learning.

Happy Gardening.

Wednesday, December 23, 2020

A Favourite Tool: My Row Marker

Even though I no longer imitate Jethro Tull (the farmer, not the rock group) with his seed drill, (that is making my garden into long rows as agriculture does and then tramping all over the garden, compacting the soil, up and down these rows), I still need a Row Marker.  It’s all about optimized spacing of all vegetables and often a straight line is the easiest way to accomplish that.

Rows within a bed and across a bed can help make weeding between these rows easier.  Proper spacing within rows can lead to ideal shading out of late coming weeds between the rows.  Even when growing in equidistant spacings over the entire bed, like with planting pole beans, the Row Marker is the tool to find those spacings.

For many years I had a collection of row markers.  They were gangly, long handled rake looking things made from scraps of wood that had wooden pegs nailed on at different spacings.  Each marker had teeth pointing both up and down for different needed intervals.  I would store them under the deck’s floor joists in a jumbled mess.  Whenever I needed one the rest would come crashing down with it.

For years I wanted one single, adjustable Row Marker but wasn’t sure how to make it.  My son, The Organic Grower (TOG) has a fine and simple one:  He uses his 30 inch aluminum landscaper’s rake.  It has teeth spaced every inch and he found some type of rubber hose – a bit like thick walled heater hose from a car’s heating system – that slide and firmly hold onto his rake’s teeth.  These 6 inch pieces of hose are easily moved to any combination of teeth as needed for marking rows within his beds.

But my favourite bow rake’s teeth didn’t have one-inch spacings.  So I needed to make an adjustable row marker from scratch. TOG had given me an old cast off potential marker made of 2 by 2’s.  It was solid and nicely braced but the handle was too short for marking rows. I easily extended the handle using a half lap joint onto another length of 2 by 2.


I had a length of hose and found 6 cast off carriage bolts the proper length and thickness, along with nuts and wing nuts.  After that it was just drilling holes across the head of the marker in one-inch increments.  


The hose pieces are slid down the bolt and held captive between the bolt head and a hex nut. Enough bolt length is left to poke through the marker’s head holes and held in place with a wing nut.


It isn’t the quickest to change but it works well.  Unused bolts are stored in extra holes partway up the handle.  And it no longer lives under the deck joists – it has a safe and secure place to hang out and socialize with my other valuable tools --- in the garage.

Happy Gardening.

Friday, December 11, 2020

A Favourite Tool: My Seed Storage Jar


Storing seeds properly is a minor but very important task.  And it can be successful and easy.  You need two things:  A large Glass Jar with a tight lid and a Rechargeable Silica Gel Desiccant.  


Lee Valley Tools markets one desiccant as Reusable Dehumidifier Bags containing about half a pound of silica gel inside a cloth bag the size of your hand.  The bag changes colour when it needs to be recharged – in that case in a microwave oven.  

I have their 40 gram desiccant packet that comes in an aluminum tin about the size of a deck of cards.  This one is recharged by gently baking 3 hours in a toaster oven at 300° F.  It currently sells for $15.


The best Jars I’ve found are the commercial 4 liter pickle jars. They have wider mouths than the normal quart sealer jar.  I’ve picked them up at the local second-hand store for 3 bucks or from any catering company or small restaurant.  Up until Covid, I enjoyed volunteering with our church's funeral catering crew and we went through those big pickle jars occasionally. 

I’m very organized so I just stuff my seed packets into my Seed Jar and keep it in my cool garage away from direct sunlight. However, I do keep a list of all varieties with their source, age, and current germination rates. That list is key for making my new seed order.  I keep an eye on my germination rates and once a variety starts to slow down or lose vigor, I replace it with a new packet of seeds.  

I used to keep my Seed Jar in my Lovely Wife’s fridge but that took up too much of Her Valuable Space.  So I tried the deep freeze but found every time I wanted to get out some seeds, the humidity in the room would quickly condense onto the very cold seeds and get them damp.

In the old days I had read that the three worst seed varieties for maintaining their germination rates were onions, peppers and parsnips.  These, I was informed, needed to be replaced each year.  But that is all wrong if you use a Rechargeable Silica Gel Desiccant and a Pickle Jar.  Out of those three 'worst' I can easily get 3 years.  And other seeds I can often get more.

Buying from a seed rack that sits in a humid area (like with a fountain nearby) is far from optimum.  Ordering seed from good suppliers is the better bet. Good quality seed is getting more and more costly.  Storing that investment properly is the answer.

Happy Gardening.
Sunday, December 6, 2020

A Favourite Tool: My Grub Hoe

One of my first tools purchased for gardening when I was a young man was a Hoe.  It had a typical ‘B’ shaped head – with the flat side of the ‘B’ used for the scraping and chopping.  The head was made from poor quality steel and wouldn’t hold a sharp edge.  Its handle was too short and it was the wrong weight: too light to chop anything solid and too heavy and dull to slice through standing weeds growing near any vegetables.  I found I rarely used it.

In the end the ‘B’ shaped hoe was good for only one thing: Mixing -- either potting mix or concrete in a wheelbarrow.  It was useless in the garden.

For years I used a shovel to loosen or turn the soil in my beds.  After turning I followed that with my bow rake to break up any clods and to mix in any soil amendments.

But over the years I struggled with the hard-packed chicken runs caused partly by our incessant winter rains in our Wet Coast.  Eventually I purchased a tiny Mantis tiller.  That broke up the clods of the sticky chicken runs but the gas Mantis was a pain to start, maintain and trouble shoot.  It was noisy, smelly, and smoky and jumped and spun while it chewed up the harder soils.  I have no small gas engine skills, it was the only small gas engine I ever owned, and eventually I was back using my peacefully quiet shovel and rake.

One day, while visiting our daughter and her family in southern California, I wandered into one of their big hardware stores and as a gardener I naturally checked out their tools.  They had a ‘Planter’s Eye Hoe’.  It was a heavy thing with a 2 lb head and a thick, longer handle.  I bought it and drove it the 1350 miles back home. 


This Grub Hoe is the same type of thing that the Third World uses instead of a shovel.  My missionary friend, Chris, in Uganda teaches the locals the Farming God’s Way program and he says he prefers a 3 lb head.


It was excellent for chopping up the chicken’s bed and I also started using it for turning my beds and mixing in amendments at the same time.
  But it did take quite a bit of energy to use. 


Then I tried it for weeding my bed paths.  It did the job just fine (this was before I perfected my dad-in-law’s Push Hoe).

This tent I live in is aging fast and comes with more and more aches and pains – my bad shoulder and much older back aren’t really arthritic, they’re just worn.  (or as Red Green said: “I’m not old, I’m ripe.”)   I’ve accepted that I’m now an old guy, so I purchased a new electric, corded Mantis.  It works like a charm, should last for many years, is so easy to start, and is way quieter than anything else motorized. (and no smelly, smoky gas engine to go wonky). The Mantis is now what I use for turning beds and mixing in amendments.  

But my Grub Hoe is still handy for small jobs – a small area to prepare for planting garlic or transplanting lettuces or to loosen up a portion of the chicken’s run so they’ll start digging and scratching there again.  The Grub Hoe is quick and easy and can be used even when kneeling in the bird’s run.  

This Grub Hoe is quite the useful tool.  Maybe that’s why billions of people are still using it. 

Happy Gardening.

Tuesday, November 17, 2020

Planting Garlic

My garlic is planted in next year’s designated onion bed.  The onions follow the greenhouse and the garlic shouldn’t be planted until the greenhouse is moved.  I’d rather the garlic didn’t have a warmer environment inside the greenhouse when starting out – it shouldn’t have too much of a start on growth but rather something slow and regulated to the actual local climate. 

My son TOG has advised against planting garlic in September here in the Fraser Valley since it might get too far ahead before the cold snaps and heavy frosts come in the winter.  So early November garlic planting after the greenhouse is moved works for me.

In the kitchen we can use 15 bulbs with about 6 cloves in each bulb for a winter supply.  Plus we need 3 more bulbs for planting 18 cloves for the next year’s crop. 

My spacing is the same as my onions: rows one foot apart across the four foot wide bed, with plants 8 inches apart in the rows.  They would do just as well with 10 inches equidistant but I find the 12 inches between rows gives me easier access for that final weed cleaning before mulching with old, shredded leaves in May.

I use my row marker for laying out the spots then trowel a 3 inch deep trench, about 6 inches wide.  Totaling up 3 rows across the bed with 6 inches on each end makes up 3 linear feet of bed = 12 square feet.  Applying Rock Phosphate (or bone meal) at a generous 4 lbs per 100 square feet for bulb plants gives us half a pound for our 18 cloves.  Alas, I did my math wrong in the garden and wound up using a full pound.  We’ll see how that works out.


Last March I acquired a full cubic yard (27 cubic feet) of ‘hot’ fresh, free-run, organic fed, layer’s chicken gold (manure) from my brother-in-law’s operation.  He had turned it twice and when I got it home I turned it every 2 or 3 days another 8 times.  It heated up really well but still smelled hot.  So I let it rest, sheltered all summer and hopefully it should be ready for next year’s growing season.  

I grabbed 2 gallons of that fine stuff, smelling much more earthy now, and applied it to the garlic row trenches along with the rock phosphate.


This I stirred in with my small single-handed cultivator.  (I once had a vintage, long, thin, ash handled, four-tight-curved-tined cultivator that was a wonder to use.  I do believe it walked away.  Always lock up your tools.)  Without this fine Chicken, I'd normally use one half pound or a bit more of Soya Meal. (4 or 5 lbs per 100 square feet.)  I feel Soya is longer lasting or slower releasing than Alfalfa meal.


After blending the mix in the trench bottom, I placed my biggest garlic cloves into the fluffed up soil with the pointy ends pointing up and covered with about 3  inches of soil.  I like Russian Red hard necked garlic.  I raked the bed flat and smooth and covered with the obligatory fence mesh to deter cats.  


I prefer not to cover the bed with a mulch for the winter, I’ve had too many pale blanched tips trying to find sunlight in January and February and once they become rudely uncovered they freeze more readily and I think that sets them back.  I tend to think it’s better to let the soil stay cooler and they can harden properly as they emerge.  I might throw some leaves over the plot under the fence wire if there’s to be a nasty week-long cold snap and then pull it off as soon as the rains return but the regular modest frosts here shouldn’t be a problem.  

The next chore won’t happen until mid-March when I’ll top dress with some more chicken gold.  Actually, this time it will be Chicken Gravy from my own hens. I can give out my gravy recipe then.

I re-read parts of our garlic growing resource book: “Growing Great Garlic” by Ron L. Engeland.  His advice on garlic depth (one inch deep) and mulch (6 inches of grass clippings after planting) are good but perhaps better for his location.  He farms in North Central Washington due south of Osoyoos, BC and has a harsher winter than us plus he only gets 16 inches of rain per year.  

I get 63 inches of rainfall and don’t like to mulch my garlic and onions until the soil has really warmed up in early May.  Before that time lack of soil moisture is never a problem and mulching in our wet spring could keep the soil too cold.   

Engeland advises that planting depth and mulch have trade offs and should be fine-tuned.  I’m pretty safe with my procedures, however he has me wondering if I was careful enough in separating the cloves – I may have planted some that became stemless (that’s a part on the bottom among the root sources).  I may have to peek at the bulbs in mid-winter looking for growth to see if I got it wrong. 

Happy Gardening.

Friday, November 6, 2020

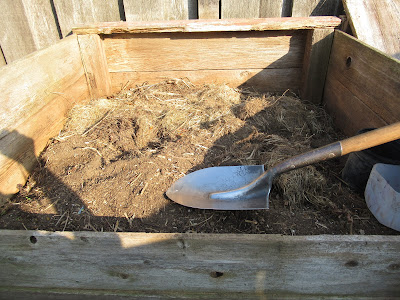
Potting Mix Step One: Emptying My Compost Box

My main composting method is a Slow Compost, a 3 or 4 year old box of weeds, shaken out pieces of sod, spent plants, garden waste and kitchen waste from the growing season.  

The other kind of compost, Fast Compost, can be cooked up in almost 3 weeks when one has all the right ingredients at the exact time.  The carbon / nitrogen ratio needs to be just right – the proper blend of carbon containing organic matter, like leaves, straw, spoiled hay, coarse plant stalks (never? sawdust) with nitrogen containing ingredients such as manures, grass clippings and other green garden waste.  For Fast Compost the right balance is blended into a 4 foot wide / high pile and turned every 2 or 3 days to add oxygen. Proper moisture levels must be maintained.  

The temperatures in Fast Compost build up to 160° F which kills pathogens and weed seeds.  It is totally wonderful stuff!  But it’s Magic.  You must get all the incantations right or you either have a cold pile or a stinking mess.  

I prefer to make my stress free, Slow Compost over a 3 or 4 year period.  I build a wooden box 4 feet square and toss in all the waste organic matter I run into from my backyard. (never sawdust, and my tree’s leaves are used for other things) I let the rain get into it occasionally and even step in it to tramp the stuff down occasionally to make room for more.  

The only potential stress comes from the fact that Slow Compost doesn’t kill weed seeds.  Therefore, I must be careful as to which weeds I throw into the box – nothing that has almost mature seeds on them.

This year my old compost box was full, so I built another one.  (That new one turned out to be 3 feet by 5 feet.)  


The front boards of the old box slide out and I start by removing the top few inches and tossing them into my new box.  Then the balance, what looks like humusy soil, is sifted over my wheelbarrow.  

I keep three containers handy, one for stones, one for bits of garbage (trash) and one for woody things like sticks, pine cones or large stems that didn’t break down.  Any non woody parts that didn’t quite break down, but should still break down, like mossy sod pieces, are tossed into the new box.  

The rest is sifted in my fine one quarter inch screen that sits on my wheelbarrow.  


Anything else that doesn’t quite go through the screen but doesn’t fit the other descriptions gets tossed around one of my grapes for mulch. 

My quarter inch screen was a bit slow for such a large amount, so I built a new screen from some galvanized, diamond shaped metal lath – the kind possibly used for some kinds of stucco or masonry work.  


I’ve learned from TOG that the longer lasting, trouble free screens have more than just staples to hold the bottom screen on.  I now use some wood strips to cover over the exposed edges of the stapled on lath.

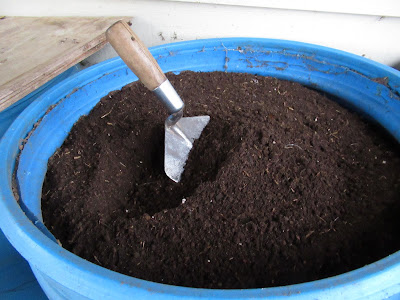
The wonderful, dark, fine stuff in the wheelbarrow is carried to my collection of barrels under my deck.  This is the main ingredient for my next few years of potting mix.


Since my soil is a Sandy Loam and has very little clay in it, even a bit of soil tossed into my compost box with the weeds and sod pieces isn’t a detriment to my potting mix.  More clay in a soil would be different.  The capillary action of water in clays turns a potting mix into something closer to concrete.

The walnut tree I planted in the front yard 36 years ago has extended its roots all through my front yard.  These roots exude a growth inhibitor so we can’t successfully grow many flowers in the front yard.  Therefore, all of our front flowers must be grown in pots and containers.  And my Lovely Wife is quite good at keeping colour in the front yard.  Our large amounts of potting mix are one key to such flowers.  

Of course, the potting mix is also great for my home seeded vegetable bedding plants.  How to fortify the mix will be described in Part 2.

Happy Gardening.

Wednesday, November 4, 2020

"Can I Move?" my Greenhouse.


In the movie, Butch Cassidy and the Sundance Kid (1969), the two bank robbers decide to go straight in order to avoid discovery and capture.  They try out for a job at a mountain mine site.  The colourful mine boss asks Sundance if he can shoot and throws a coin in the dirt for him to shoot at.  Sundance, standing still, misses.  Then Sundance asks, “Can I Move?’ and when he's in motion, hits the coin numerous times.  The two are hired as payroll guards.

My greenhouse also has to Move!  Growing in containers doesn’t really work that well organically.  Commercial greenhouse growers use bags of growing medium and a nutrient rich chemical soup piped in to drip into the plants’ root systems.  Pesticides are used for controlling pests and such in the close mono-cropped greenhouses.  Organics don’t abide those conditions.

I plant my greenhouse plants: tomatoes, peppers, cucumbers, and melons in the soil.  To do that for more than one year in the same spot results in nutritional deficiencies, pests and diseases.  So my greenhouse follows my four year crop rotation plan throughout the garden.  Each year it moves to the next set of beds. 

Eliot Coleman is an advocate of moving greenhouses and hoophouses.  My son, The Organic Grower (TOG) followed his lead and has successfully rolled his houses (13' X 50' and 20’ X 50’) using Coleman’s directions with both permanent and portable wheels for over 10 years.  (mine had been moving for much longer) 

My old greenhouse was smaller, 8 by 10 feet, made of cedar 2 X 2’s and sitting on a frame of cedar 4 X 4’s.  It was light enough to be pulled with a rope on skids to the next two beds.  

My new greenhouse is larger and much heavier, made of spruce 2 X 3’s and built upon spruce 2 X 10’s, it is 12 by 15 feet and covers three beds.  After I put it together, I discovered it wasn’t going to be moved by sliding it over skids like the old one.  And both TOG and I agreed it couldn’t be lifted by four guys and walked across the garden.

Last year I set up some rollers to go under the sides of the greenhouse and some planks to go under the rollers.  That hardly worked.  It constantly slid sideways off the rollers.  It was at the fourth year of the rotation and it needed to proceed over the whole garden to start over from the beginning.  Much like the carriage on an old manual typewriter, the bell had dinged and now the page must be moved to the other end to start another line of typing.  It took several difficult hours to “roll” the greenhouse to the far end.

This year I wanted to do something easier.  I bought four small, 10 inch pneumatic tires with wheel rims and bearings from Princess Auto.  I waited for a sale and picked them up for about $7 each.  Then I bought some ready rod – a six foot long piece of 5/8 inch threaded steel rod, and cut that into eight pieces for axels.  

I made skateboard like ‘scooters’ out of 2 X 4’s and since I didn’t have a drill press to make the holes for the axels perfectly perpendicular, I drilled ¾ inch holes.  There was no need to use nuts on the axels since we weren’t taking any corners, just slide the rods through the holes and wheels and let the weight of the load hold them in place.  


I guessed the house weighed about 600 lbs so that would put 75 lbs on each of the eight wheels. (the other four wheels I borrowed from the grandkids’ wagon).


Using a 45 year old piece of very hard Douglas Fir 2 X 10 for a lever, I got my Lovely Wife to stand on the plank, raising the end of the house while I installed each pair of wheels under the four door frames on the bed’s paths.


Then I pushed modestly and it started to roll nicely.  But then stopped.  Alas there was a kale plant that needed to be pushed down on its side to clear the under carriage.  It would hopefully survive and supply us with an extra early spring picking inside the greenhouse.


Once the kale cleared, the greenhouse rolled like a charm until it got to the end of the bed where the leading protruding wheels on the lower bed path came up to the higher grassed cross path.  I quickly got my shovel and carved a large divot out of the permanently grassed pathway to let the wheel continue the last foot.  Once the house was off its wheels there was no moving it, so I needed it to sit exactly where it was to rest.  

Removing the wheels was easier than installing them.  The sod divots from the grassed cross path were replaced and all sat well.  I will eventually drive some stakes to act as anchors against the winter winds (that is how the old greenhouse died) but I think the house’s weight will be the greater anchor.

Like Sundance’s shooting, my greenhouse performs much better when it Moves.

Happy Gardening.

Sunday, October 11, 2020

Winter Cover Crop: Fall Rye

The idea behind the winter cover crop is to keep the soil from being exposed to the elements during winter.  Eaton Rapids Joe says it better: “One reason to plan a cover crop over the winter is so your nutrients don't leach downward out of the root zone.”  It is also great for building up the humus – organic matter in the soil.  Constant nitrogen inputs, organic feed meals, hotter manures, or otherwise, will deplete your humus content as the microbes consume it when breaking down the fertilizers.

I found that out the hard way when I used to move / rotate my chicken run into each bed during the winter.  I wasn’t adding organic matter to the hot manure, even though it was scratched in by the birds and naturally sheet composted in the soil.  Gradually my soil got gummier and stickier as humus and tilth degraded.

One way to improve my humus content was to plant a fibrous rooted plant like Rye in the fall.  Both Eliot Coleman and Steve Solomon lean towards other cover crops and ‘green manures’ preferring legumes like vetches, clovers, field peas and the like.  They prefer ones that are killed with the frost and so don’t produce weed seeds and are easy to till in in the spring.  Both deem rye as too hard to work with in the spring (it can grow quickly) --- better for agribusiness and its machinery they say.

But I’ve had good success with Fall Rye.  It gets planted in most beds after their crop has been harvested.  The secret is to cover it with black plastic in the spring, a month or more before needing to work the bed.  This covering stunts or even kills the rye plants and still leaves a good supply of fine rootlets in the soil.  

The plastic cover also keeps the soil dryer during our very wet Pacific North West spring so I can pull off the plastic, trim the edges for weeds and till.  No need to wait for 3 or more dry days before working the soil.

My son TOG likes to stir in all the residual organic matter but I still like to shake out by hand the remaining plants in the spring so they don’t foul my little tiller.  This still leaves a lot of mostly decomposed organic matter in the soil.  My tilth has been improving these last 5 years without chickens.  But now with two new birds acquired for this Covid emergency, I’ll be more considerate in adding additional organic matter into their run as well as the fall rye they get to eat and dig up.

Several years ago, I bought a big sack of rye seed from Otter Co-op to last a number of years.  Alas, the second year it grew bugs instead.  I left the grain in its original sack in the garage and the moths and their worms went for it.  Smart bugs, they ate the germs – the nutritious plant growing part -- and left the rest of the seed grain.  I tried planting that the third year but nothing came up.  

So I bought another sack – it’s so much cheaper per pound than buying smaller quantities.  This time I stored it in a large plastic pail with a tight lid but also added a secret weapon: cinnamon sticks.  And boy did that work.  


No moths or worms or clumpy webs in the rye seed.  This year my two year old seed came up splendidly.  (cinnamon sticks also work great for keeping the bugs out of larger stored quantities of walnuts, oatmeal, organic whole grain flours and the like.)

I experimented with seeding 1 lb per 50 square feet verses ¾ lb.  Also tried the usual raking the seed in verses lightly covering it with screened soil.  Not too much difference so it is now to be ¾ lb per 50 square feet, raked in.  (I may try ½ lb in another later bed)

First, I raked the beds flat and kept the surface stone free so I may mow it with my lawn mower if need be.  Next, I broadcast seeded each bed, always sprinkling seed sparingly at first so I didn’t run out of seed prematurely and then went back and filled in any sparse spots.  Then I gently raked / scuffled the bed with the teeth of my bow rake.  Finally, I covered each bed with my fencing wire pieces so the neighbourhood cats wouldn’t scratch it all up.

The rye came up like weeds in the good weather.  It is now tall enough for me to cut some each day for the chickens – they love it.  Great for making bright yellow-orange yolks too.  Now I need to remove the wire fence sections and hang them up on the back board fence for storage.


A lot of the rye won’t be needing much turning in with the birds rotating through most of the rye beds before spring.  Once they’re moved out of a pair of beds, I’ll either reseed or cover with a piece of black plastic.  

Soon I’ll start to rake leaves in my neighbourhood and I’ll chop up some with the lawnmower to add to the bird’s run.  That should blend well with their droppings, adding some gentle carbon to help build up the humus levels. 

Happy Gardening.